You are viewing an ATOM formatted XML site feed. Usually this file is inteded to be viewed in an aggregator or syndication software. If you want to know more about ATOM, please visist Atomenabled.org
Wesley2026-06-08T23:53:00Z2026-06-08T23:53:00Z2026-06-08T23:53:00Zhttp://tool-box.info/blog/wfwcomment.php?cid=44050http://tool-box.info/blog/rss.php?version=atom0.3&type=comments&cid=4405http://tool-box.info/blog/archives/4405-guid.htmlToday’s “The Toon-Box”
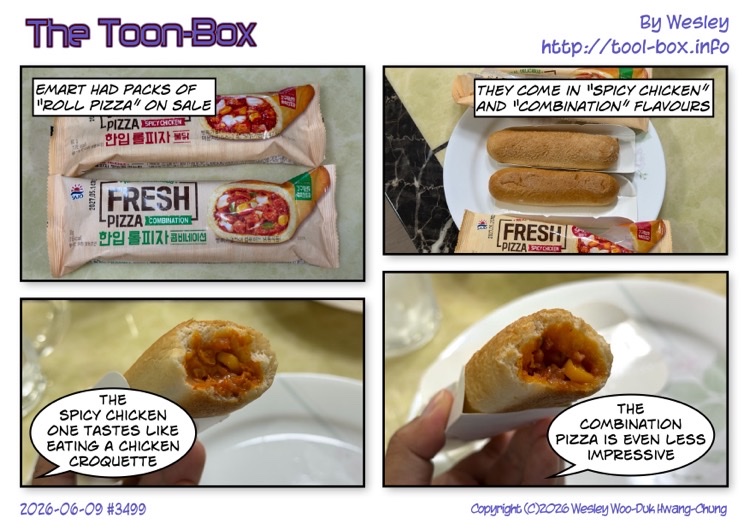
chickenpizzaWesley2026-06-07T23:48:00Z2026-06-07T23:48:00Z2026-06-07T23:48:00Zhttp://tool-box.info/blog/wfwcomment.php?cid=44040http://tool-box.info/blog/rss.php?version=atom0.3&type=comments&cid=4404http://tool-box.info/blog/archives/4404-guid.htmlToday’s “The Toon-Box”
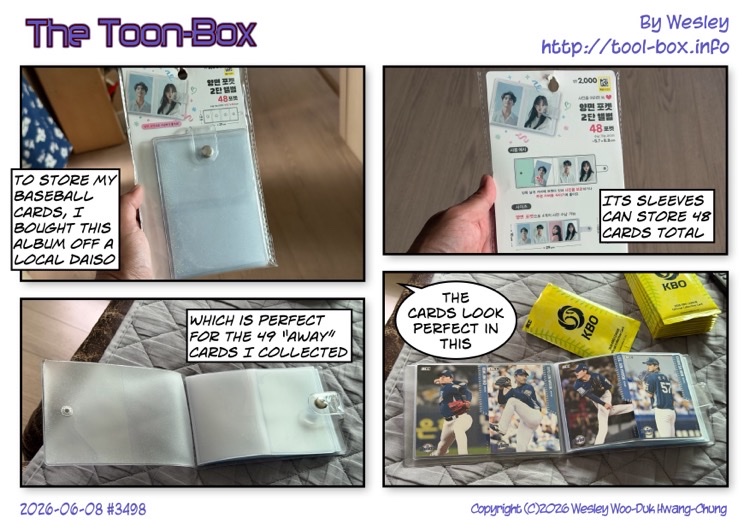
albumbaseballcardWesley2026-06-05T00:11:00Z2026-06-05T00:11:00Z2026-06-05T00:11:00Zhttp://tool-box.info/blog/wfwcomment.php?cid=44030http://tool-box.info/blog/rss.php?version=atom0.3&type=comments&cid=4403http://tool-box.info/blog/archives/4403-guid.htmlToday’s “The Toon-Box”
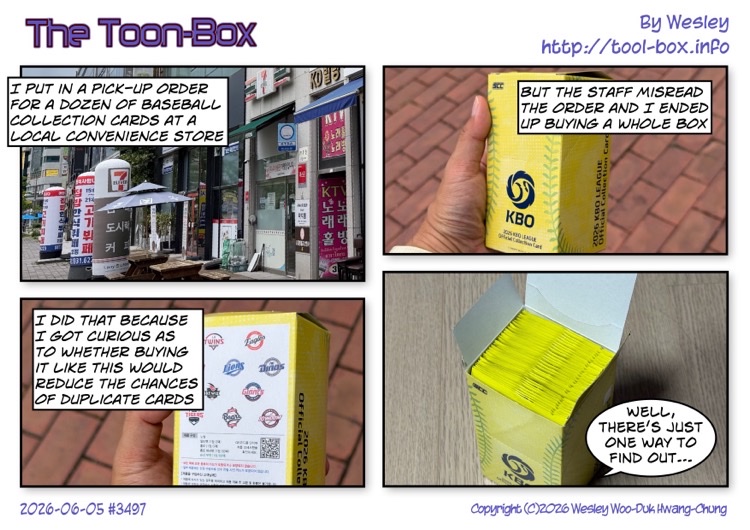
baseballBitgaram CitycardCollectorsconvenience storeNajuWesley2026-06-03T23:51:00Z2026-06-03T23:51:00Z2026-06-03T23:51:00Zhttp://tool-box.info/blog/wfwcomment.php?cid=44020http://tool-box.info/blog/rss.php?version=atom0.3&type=comments&cid=4402http://tool-box.info/blog/archives/4402-guid.htmlToday’s “The Toon-Box”
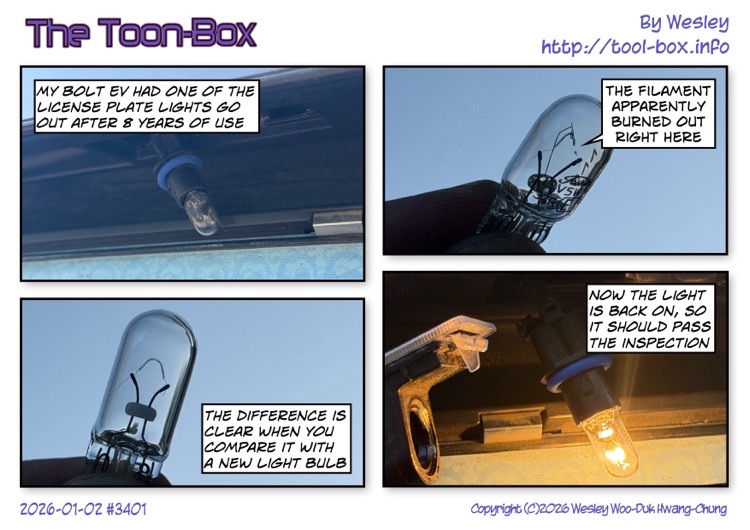
Bolt EVcarelectric vehiclelicenselightsrepairWesley2026-06-01T23:44:00Z2026-06-01T23:44:00Z2026-06-01T23:44:00Zhttp://tool-box.info/blog/wfwcomment.php?cid=44010http://tool-box.info/blog/rss.php?version=atom0.3&type=comments&cid=4401http://tool-box.info/blog/archives/4401-guid.htmlToday’s “The Toon-Box”
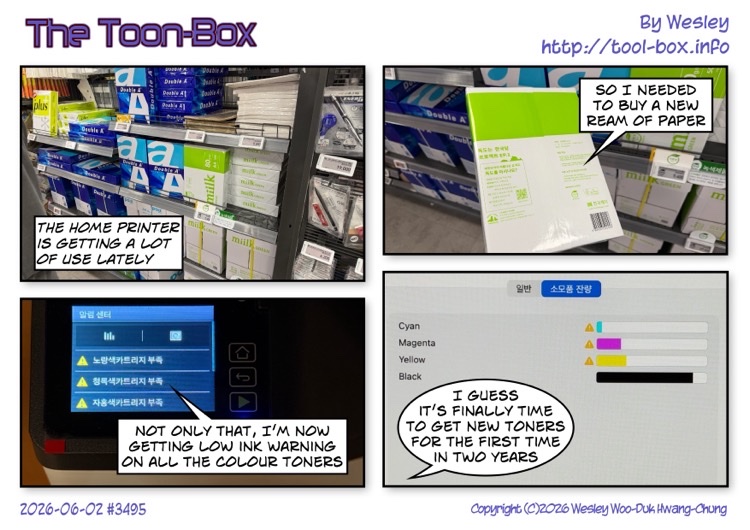
paperprintertonerWesley2026-05-31T23:55:00Z2026-05-31T23:55:00Z2026-05-31T23:55:00Zhttp://tool-box.info/blog/wfwcomment.php?cid=44000http://tool-box.info/blog/rss.php?version=atom0.3&type=comments&cid=4400http://tool-box.info/blog/archives/4400-guid.htmlToday’s “The Toon-Box”
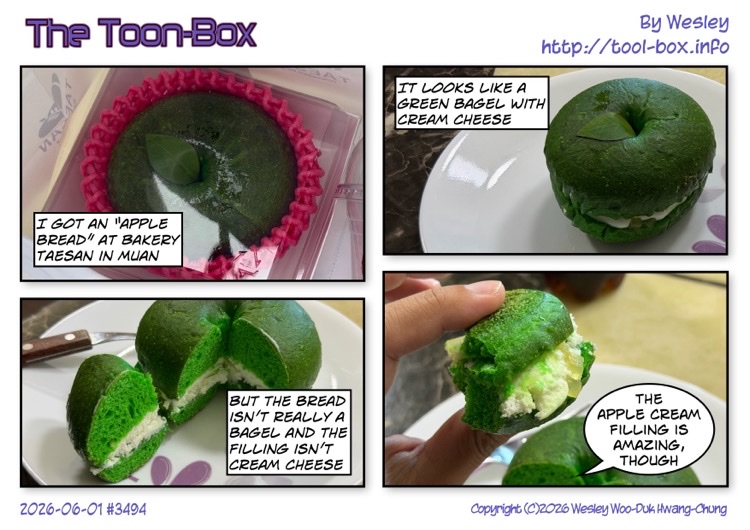
applebreadWesley2026-05-28T23:59:00Z2026-05-28T23:59:00Z2026-05-28T23:59:00Zhttp://tool-box.info/blog/wfwcomment.php?cid=43990http://tool-box.info/blog/rss.php?version=atom0.3&type=comments&cid=4399http://tool-box.info/blog/archives/4399-guid.htmlToday’s “The Toon-Box”
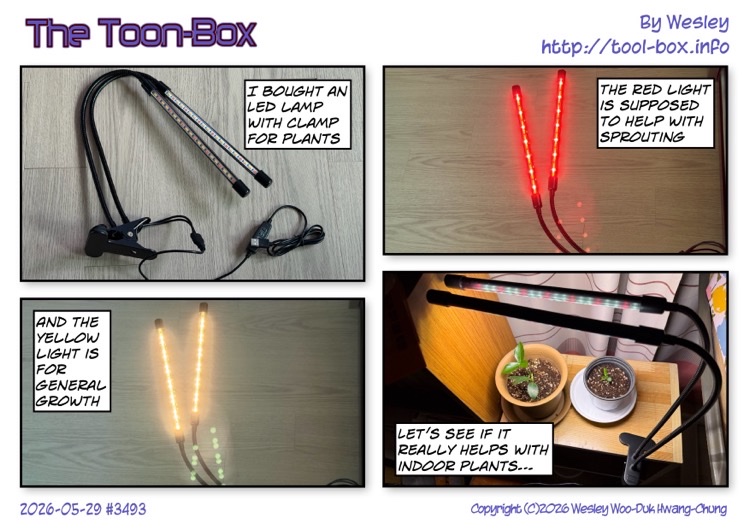
LEDlightsplantWesley2026-05-27T23:55:00Z2026-05-27T23:55:00Z2026-05-27T23:55:00Zhttp://tool-box.info/blog/wfwcomment.php?cid=43980http://tool-box.info/blog/rss.php?version=atom0.3&type=comments&cid=4398http://tool-box.info/blog/archives/4398-guid.htmlToday’s “The Toon-Box”
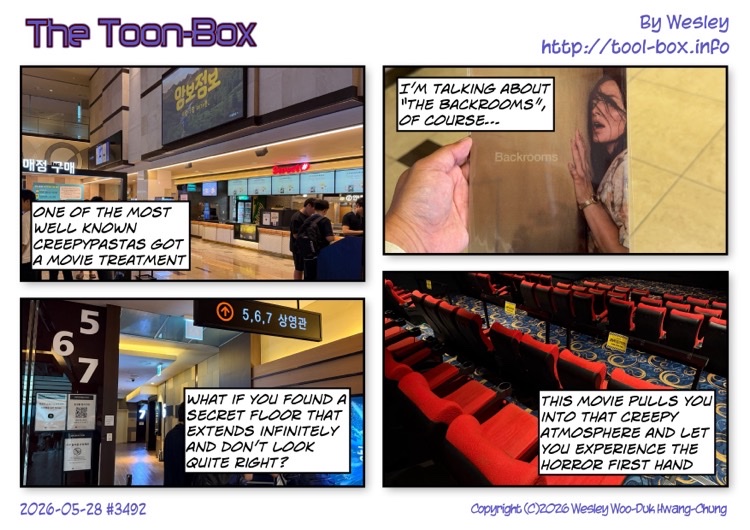
BackroomsGwangjuMegaboxmoviemovie theatreWesley2026-05-26T23:50:00Z2026-05-26T23:50:00Z2026-05-26T23:50:00Zhttp://tool-box.info/blog/wfwcomment.php?cid=43970http://tool-box.info/blog/rss.php?version=atom0.3&type=comments&cid=4397http://tool-box.info/blog/archives/4397-guid.htmlToday’s “The Toon-Box”
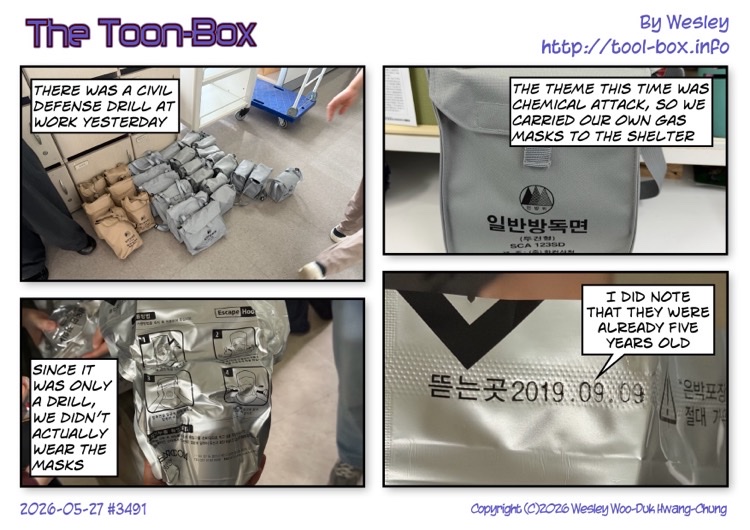
civil defense drillKPXmaskWesley2026-05-25T23:49:00Z2026-05-25T23:49:00Z2026-05-25T23:49:00Zhttp://tool-box.info/blog/wfwcomment.php?cid=43960http://tool-box.info/blog/rss.php?version=atom0.3&type=comments&cid=4396http://tool-box.info/blog/archives/4396-guid.htmlToday’s “The Toon-Box”
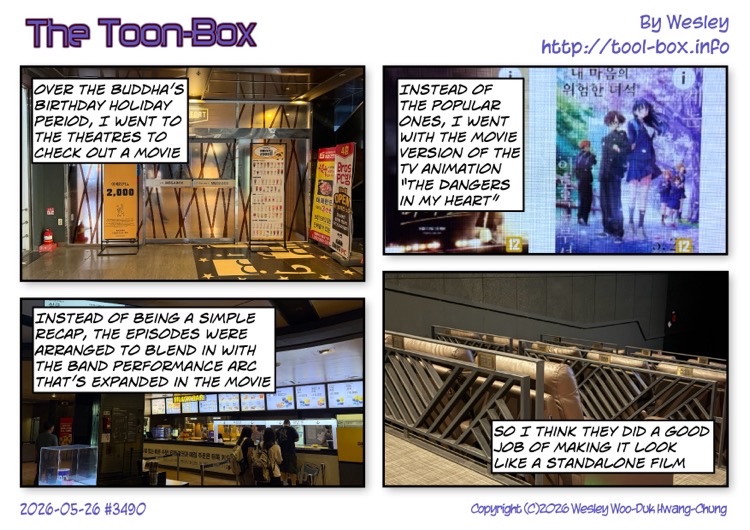
animationDangers in My HeartGwangjuMegaboxmoviemovie theatreWesley2026-05-22T00:03:00Z2026-05-22T00:03:00Z2026-05-22T00:03:00Zhttp://tool-box.info/blog/wfwcomment.php?cid=43950http://tool-box.info/blog/rss.php?version=atom0.3&type=comments&cid=4395http://tool-box.info/blog/archives/4395-guid.htmlToday’s “The Toon-Box”
baseballcardCollectorsWesley2026-05-20T23:50:00Z2026-05-20T23:50:00Z2026-05-22T00:05:27Zhttp://tool-box.info/blog/wfwcomment.php?cid=43940http://tool-box.info/blog/rss.php?version=atom0.3&type=comments&cid=4394http://tool-box.info/blog/archives/4394-guid.htmlToday’s “The Toon-Box”
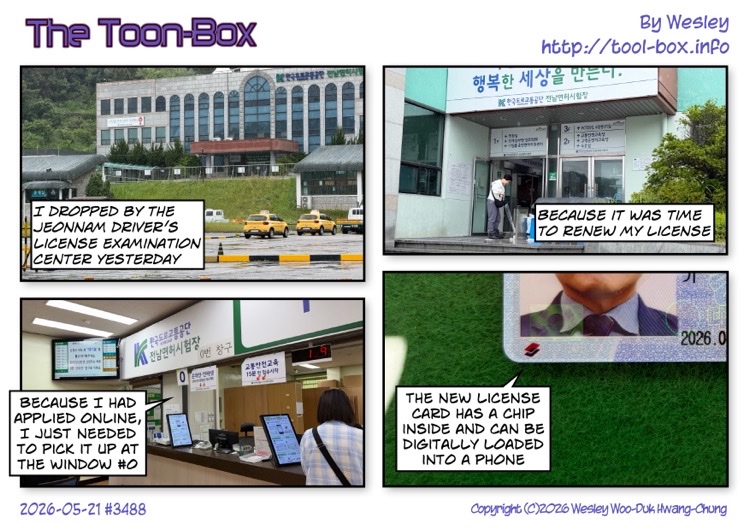
carcardlicenseNajuWesley2026-05-20T00:04:00Z2026-05-20T00:04:00Z2026-05-20T00:04:00Zhttp://tool-box.info/blog/wfwcomment.php?cid=43930http://tool-box.info/blog/rss.php?version=atom0.3&type=comments&cid=4393http://tool-box.info/blog/archives/4393-guid.htmlToday’s “The Toon-Box”
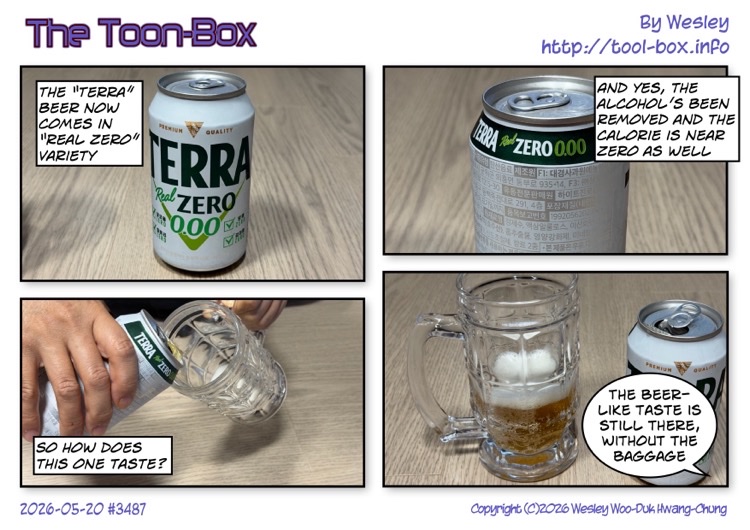
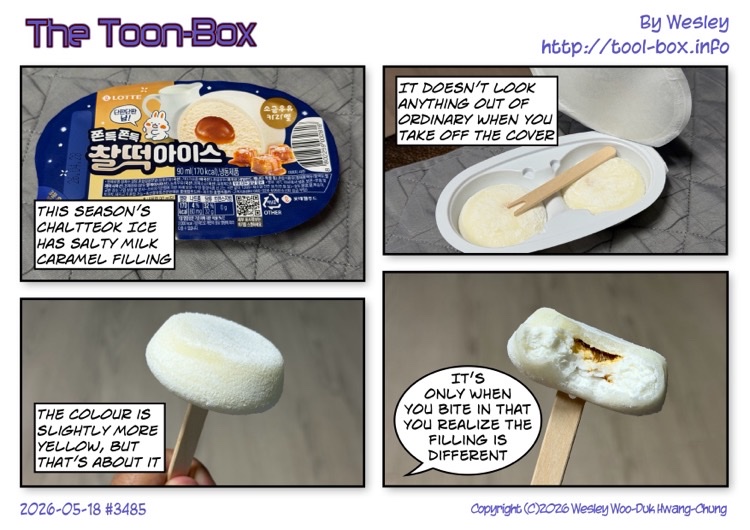
beerbeverageTerrazeroWesley2026-05-18T23:47:00Z2026-05-18T23:47:00Z2026-05-22T08:37:28Zhttp://tool-box.info/blog/wfwcomment.php?cid=43920http://tool-box.info/blog/rss.php?version=atom0.3&type=comments&cid=4392http://tool-box.info/blog/archives/4392-guid.htmlToday’s “The Toon-Box”
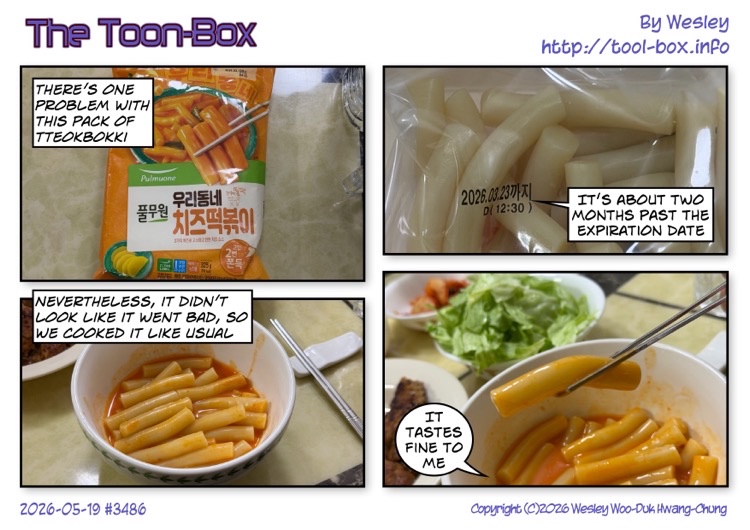
cheesetteokbokkiWesley2026-05-17T23:48:00Z2026-05-17T23:48:00Z2026-05-17T23:48:00Zhttp://tool-box.info/blog/wfwcomment.php?cid=43910http://tool-box.info/blog/rss.php?version=atom0.3&type=comments&cid=4391http://tool-box.info/blog/archives/4391-guid.htmlToday’s “The Toon-Box”